FontAwesome icon pack is quite popular in Web Development and it has got alot of custom icons related to almost every possible situation in your app/website that you may want to use.
How FontAwesome Works
The thought behind the FontAwesome symbol pack is straightforward. The symbols are dealt as characters. For instance, you can undoubtedly duplicate and glue this β character or this ∑ character. It’s additionally possible to change their size and colors. That’s because the browser and the text editor see these characters as text.
FontAwesome expands upon this concept by including a wide range of icons. You choose an icon from the list, take note of its Unicode character, and use it in a TextView, telling Android to render it using the FontAwesome font.
Android Setup
- Download the FontAwesome project from Github.
- Extract
fontawesome-webfont.ttffile located infontsfolder. - Place
fontawesome-webfont.ttfwithinassetsdirectory.- Navigate to
app > src > mainin your Android project. - Create a new directory named
assets. If it’s already there then skip this. - Place
fontawesome-webfont.ttfinassets. You may want to put this file in a separate directory namedfontswithinassets.
- Navigate to
NOTE: Note that the fonts directory is not required. As long as the FontAwesome font file is located in the assets directory, or a subdirectory thereof, you’re good to go.
Helper Class
package in.incognitech.reminder.util;

import android.content.Context;
import android.graphics.Typeface;
import android.view.View;
import android.view.ViewGroup;
import android.widget.TextView;

/**
 * Created by udit on 13/02/16.
 */
public class FontAwesomeManager {

	public static final String ROOT = "fonts/";
	public static final String FONTAWESOME = ROOT + "fontawesome-webfont.ttf";

	public static Typeface getTypeface(Context context, String font) {
		return Typeface.createFromAsset(context.getAssets(), font);
	}

}
Basically, we are making use of android.graphics.Typeface class which can be applied to any text that is gonig to be rendered on screen. The Typeface class specifies the typeface and intrinsic style of a font. This is used to specify how text appears when drawn (and measured).
So after defining this class in your project, you can apply typface to your TextView in your Activity class with following snippet.
// ...
TextView textView = (TextView) findViewById(R.id.textView);
textView.setTypeFace(FontAwesomeManager.getTypeface(this, FontAwesomeManager.FONTAWESOME));
// ...
One Step Ahead
Well, above steps were all we need to do to apply the specific fonts to texts. But we can improvise on this. Above, we need to create object for each of the TextView in the layout, but generally, icons are often contained in a ViewGroup wrapper such as LinearLayout or RelativeLayout. We can create a recursive method to find out all of the TextView elements within a container and apply TypeFace to each of them.
public class FontAwesomeManager {
	// ...
	public static void applyTypeFace(View v, Typeface typeface) {
		if (v instanceof ViewGroup) {
			ViewGroup vg = (ViewGroup) v;
			for (int i = 0; i < vg.getChildCount(); i++) {
				View child = vg.getChildAt(i);
				applyTypeFace(child);
			}
		} else if (v instanceof TextView) {
			((TextView) v).setTypeface(typeface);
			}
	}
	// ...
}
Above method should work for the following layout.
<LinearLayout
	xmlns:android="http://schemas.android.com/apk/res/android"
	xmlns:tools="http://schemas.android.com/tools"
	android:id="@+id/icons_container"
	android:layout_width="match_parent"
	android:layout_height="match_parent">

	<TextView
		android:layout_width="match_parent"
		android:layout_height="wrap_content" />

	<TextView
		android:layout_width="match_parent"
		android:layout_height="wrap_content" />

	<TextView
		android:layout_width="match_parent"
		android:layout_height="wrap_content" />

</LinearLayout>
And we can write following code in our Activity class to apply TypeFace to all three of TextView instances at once.
Typeface iconFont = FontAwesomeManager.getTypeface(getApplicationContext(), FontAwesomeManager.FONTAWESOME);
FontAwesomeManager.applyTypeFace(findViewById(R.id.icons_container), iconFont);
Choose Specific Icons from FontAwesome
- Go to FontAwesome Icon Search page.
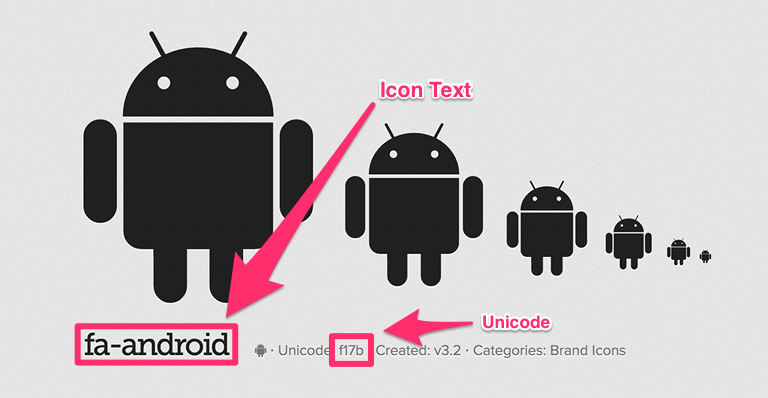
- You can choose any of the icon that you like. E.g, let me choose Android Icon.
-
Note down the text & unicode for this icon.

- Navigate to
app > src > main > res > values. -
Create a new directory named
icons.xml. This file will serve as a dictionary. This means that we need to create an entry for each icon. You can add icon entries in this file as follows:<resources> <string name="fa_android"></string> <string name="fa_pie_chart"></string> <string name="fa_line_chart"></string> </resources>
Apply Icons to TextView
<TextView
	android:layout_width="match_parent"
	android:layout_height="wrap_content"
	android:text="@string/fa_android" />

<TextView
	android:layout_width="match_parent"
	android:layout_height="wrap_content"
	android:text="@string/fa_pie_chart" />

<TextView
	android:layout_width="match_parent"
	android:layout_height="wrap_content"
	android:text="@string/fa_line_chart" />
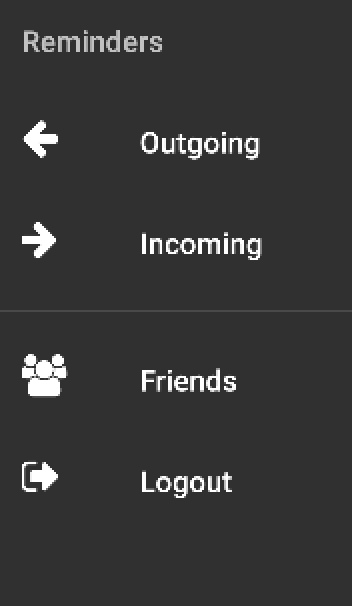
After this, you can simply build you project and launch your app in a simulator/physical device. You should now see the icons correctly rendered.

Of course, you can change the size and color of the icons just like you change for any text in Layout files. They look much more crisp and sharp, as they are rendered at runtime and they are vector instead of raster files.
Benefits
- You don’t have to worry about different screen densities on different smartphones. With FontAwesome, it’s just single TTF file.
- When you use PNGs as icons for your Android app then you may have to include multiple versions of same icons for different screensizes.
- Also, in some ultra-dense HD displays, the PNGs may look distortd.
- You can rely on one of the extensive & rich database for icons which is at no cost (at least for now
 ).
).
Problem
The problem with this method is that you always have to work on text format for these icons. But there are times when you want to add icons for MenuItems or ImageView objects where they accept a Drawable object as a icon. So above method won’t work directly.
Solution
You can make use of this hybrid class from Text & Drawable, called TextDrawable. This class extends Drawable class and appends the functionality of Text within it so that you can apply TypeFace, colors, font size and other attributes.
You can simply create a TextDrawable object, set the font string for the object and pass it to setIcon() method of any view object. And that should work.
Example:
// ...
TextDrawable faIcon = new TextDrawable(this);
faIcon.setTextSize(TypedValue.COMPLEX_UNIT_DIP, 20);
faIcon.setTextAlign(Layout.Alignment.ALIGN_CENTER);
faIcon.setTypeface(FontAwesomeManager.getTypeface(this, FontAwesomeManager.FONTAWESOME));
faIcon.setText(getResources().getText(R.string.fa_android));
Menu menu = (Menu) findViewById(R.id.menu);
MenuItem menuItem = menu.findItem(R.id.menu_item);
menuItem.setIcon(faIcon);
// ...